Flowcharts are popular tools in business, academia, and other fields because they display information in an attractive format. A flowchart uses standard symbols and lines to communicate the general flow and specific steps of a process.
3 minute read
Want to make a Diagram of your own? Try Lucidchart. It's quick, easy, and completely free.
Creating flowchart templates in PowerPoint
Although PowerPoint is usually reserved for slideshows and presentations, it can also be used to sketch out flowcharts. Follow this guide to make and edit basic flowchart templates in Microsoft PowerPoint 2013.
Remember that while PowerPoint can double as an image creation tool, there are several disadvantages to this approach. Each element that you add, from text boxes to lines, remains static. In contrast, Lucidchart’s interface and objects are highly responsive; plus, you can add interactivity and work in real-time with others.
Read on for three ways to create flowchart templates in PowerPoint.
How to make a flowchart template in PowerPoint
1. Open a new presentation in Microsoft PowerPoint.
2. Add shapes to a slide by selecting the Insert tab and clicking either SmartArt or Shapes.
3. If you select SmartArt:
-
Choose a SmartArt graphic from the dialog that appears and click OK.
-
To replace your SmartArt, select it and click the SmartArt Graphics (Insert > SmartArt). Then select another flowchart type.
-
Continue to add shapes and connect them with lines until the flowchart is complete.
If you choose Shapes:
-
Select the shape you want to add, then click the slide to insert. You can also click and drag to set the shape’s dimensions.
-
Continue to add shapes and connect them with lines until your flowchart is ready.
4. Connect shapes with lines by clicking Insert > Shapes. Choose a desired line style, then click and drag on the slide to draw a line.
5. Add details to each step by double-clicking the SmartArt graphic or Shape and typing. Alter fonts with the dialog that appears next to the shape.
6. For quick style changes, right-click a shape, or right-click while holding Shift on a selection of shapes, and choose from the menu options that appear.
7. For more comprehensive formatting options, select the object. You’ll see either one tab (Format) or two tabs (Format and Design) appear in the ribbon. Click a tab to expand. You can customize your flowchart with the buttons in these tabs.
8. You’re now ready to print or email your flowchart template from PowerPoint.

Diagramming is quick and easy with Lucidchart. Start a free trial today to start creating and collaborating.
Make a diagramHow to import a Lucidchart flowchart into PowerPoint
1. Download the MS Office Add-On if you haven’t already. It’s completely free.
2. Make a flowchart in Lucidchart. Use this guide to learn how to make a flowchart in Lucidchart if you need help getting started.
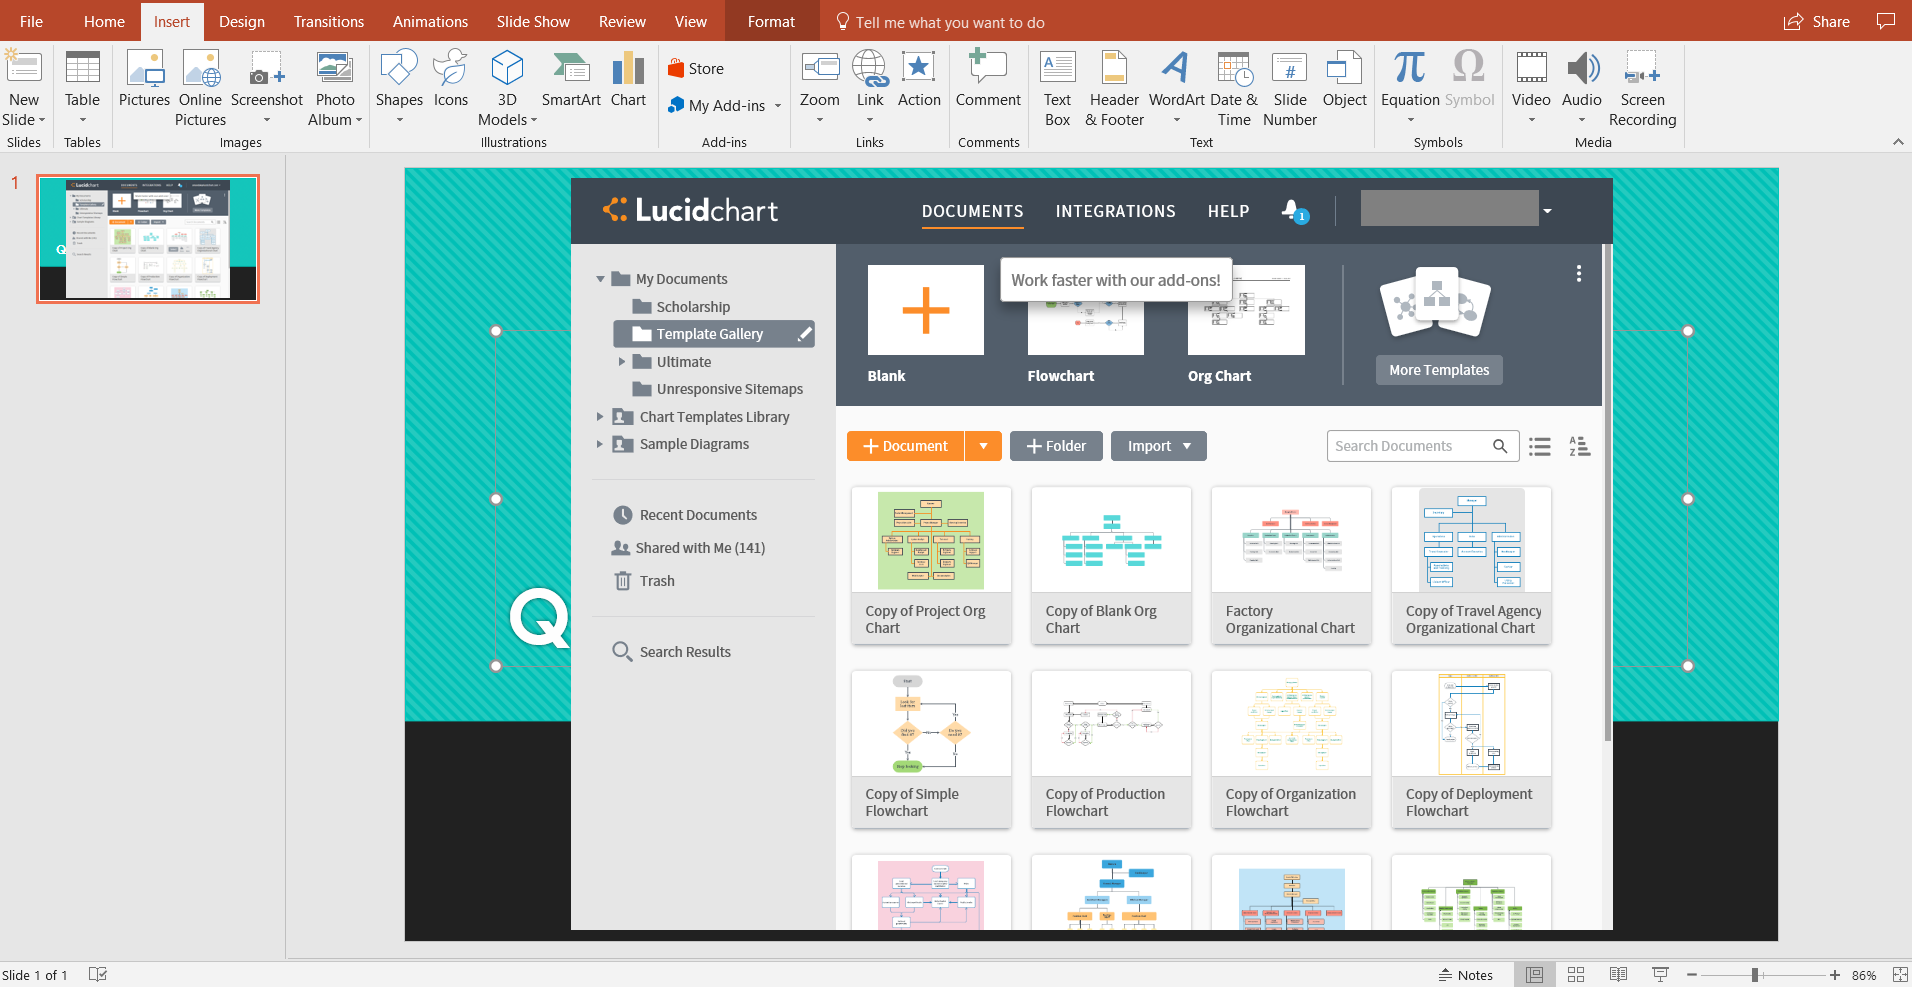
3. Open your PowerPoint presentation, go to Insert and click on your Add-Ins to select Lucidchart. You must have a section within the slide selected in order to activate your Add-Ins.
4. Select your flowchart from your documents listed to insert into your PowerPoint slide.

You now have a finished flowchart template that can be saved and published from Excel. While you also have the option to save your flowchart as an image and import it into your Excel sheet, by using the Add-On, you’re able to display the most up to date version of the flowchart at the click of a button. Nonetheless, we’ll show you how to add your diagram as an image below.
How to import a Lucidchart flowchart as an image into PowerPoint
1. Create a new document or open any flowchart template in Lucidchart if you prefer.
2. Customize and edit your flowchart in the Lucidchart editor.
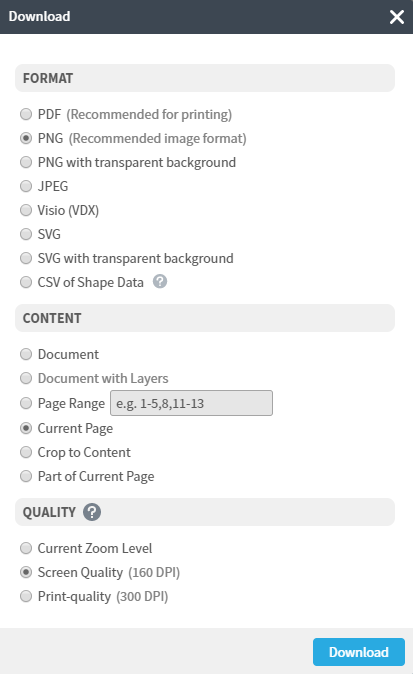
3. Save the diagram as a .PNG file by clicking File > Download As and selecting the .PNG option.
4. Open an Excel document, then click Insert > Pictures. Upload the file you just downloaded.
You should now have an image of your flowchart in your PowerPoint slides.

