5 steps to build a next-level product roadmap in Lucidchart
Paige Allen
Reading time: about 8 min
5 steps to build your product roadmap in Lucidchart
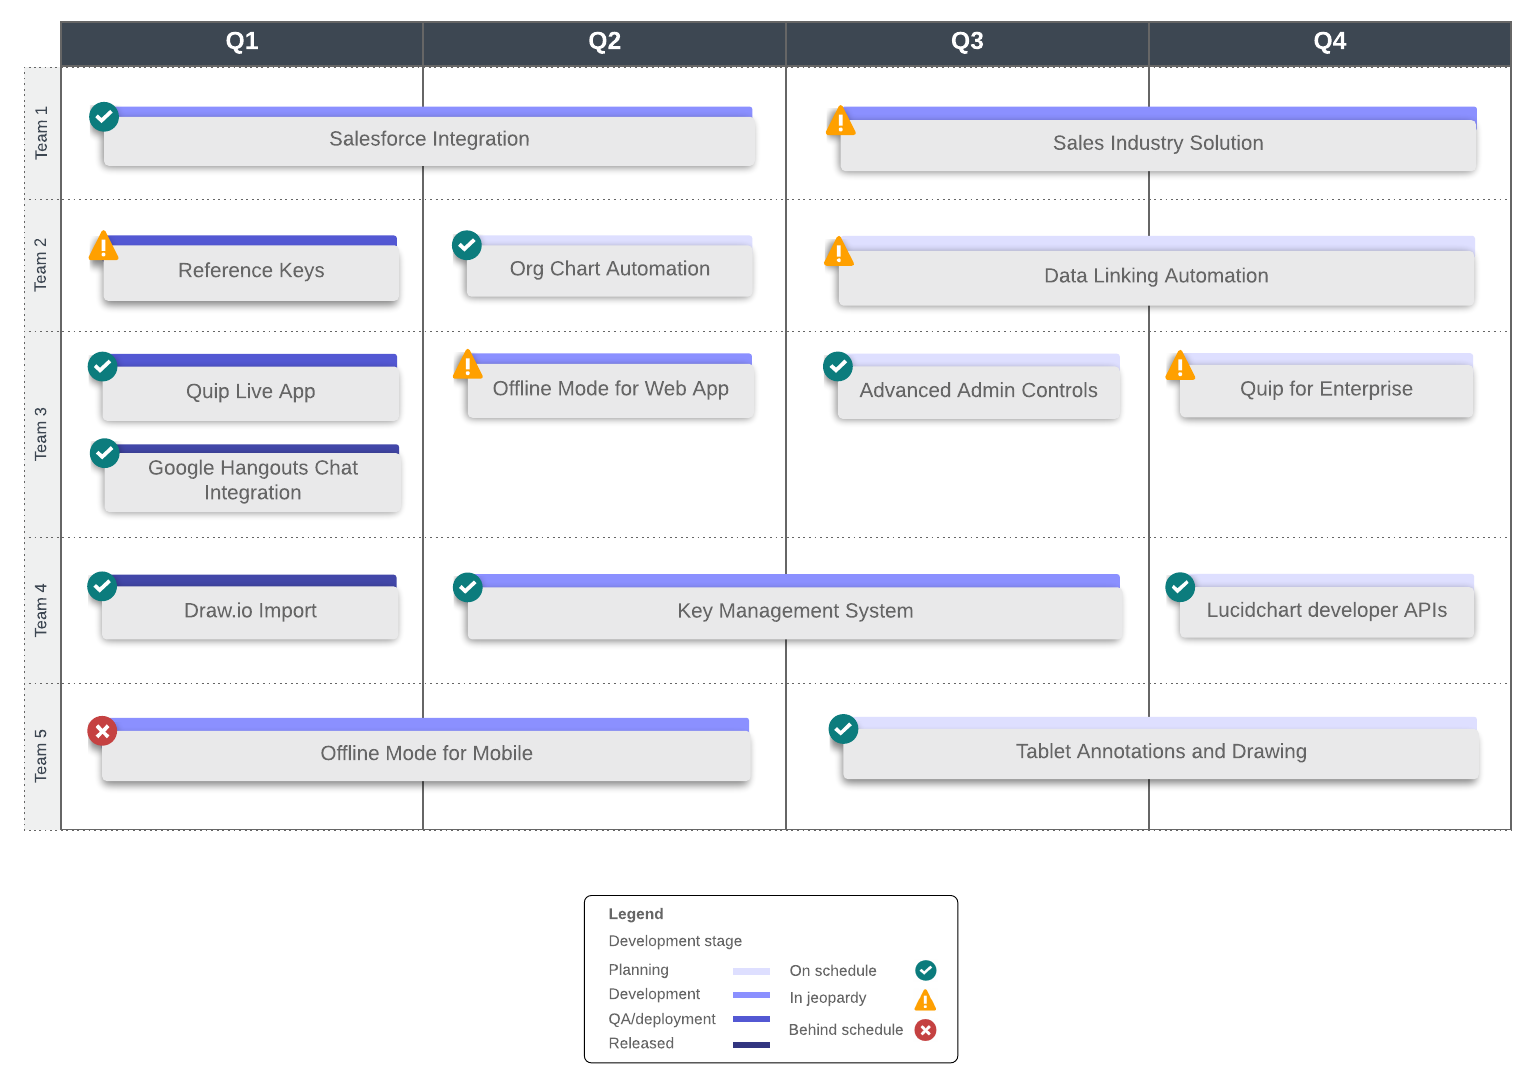
A roadmap can be a great way to clarify your next project or product launch. Making that product roadmap visual, easy to read, and linked to relevant data can save you time and drastically improve clarity as you move your project forward. Use this post to learn how to make a product roadmap all in Lucidchart.
1. Start with a product roadmap template
Lucidchart makes building a product roadmap easy from the start—in fact, we do most of the work for you! Templates will show you what’s possible and give you the means to make your dreams of building a powerful, data-driven roadmap a Lucidchart reality.
To access product roadmap templates, visit the template gallery, login to your account, and type “product roadmap” in the search bar.
Lucidchart the visual solution for mapping out your processes, strategies, and goals for any project or product.
Use our product roadmapping softwareSimple as that. Each template has a description and additional resources on the right side of the diagram. Templates are fully customizable and will give you the head start you need to link your data to your roadmap.
Jump into Lucidchart and explore templates to help you jumpstart your diagrams, processes, and roadmaps.
2. Connect your product roadmap to live data
Once you’ve customized your roadmap template, you’re ready to add data. Connecting data will help you to fill in feature names, development stages, statuses for major projects, and more.
If you are starting from a template, the next step to building your product roadmap is to customize the data in the template that you have chosen or replace the dataset with one of your own. To replace the currently linked data, follow these simple instructions:
- Click the “Data” in the Dock on the right side of the editor. It is the second option from the bottom.
- Select Manage Data > Replace Dataset.
- Follow the prompts to select a Google Sheet, Excel spreadsheet, or CSV.
- Once you’ve imported your data, drag and drop a new row of data onto selected epics, stories, or initiatives and click “Replace data.”
If you are starting from scratch, connect your roadmap to live data in Google Sheets or data from a CSV file. This tutorial will show you how to link data to your product roadmap.
Or you can follow these simple instructions:
- Click File > Import Data.
- Select “Data Linking” from the pop-up window.
- Follow the prompts to select a Google Sheet, Excel spreadsheet, or CSV.
- Once you’ve imported your data, drag and drop a new row of data onto selected epics, stories, or initiatives.
Will my product roadmap automatically update when I make changes to the spreadsheet?
If your diagram is connected to a Google Sheet, the data in your product roadmap will automatically update when you make changes to your spreadsheet. You have the option to change this setting to either automatically update every 30 seconds, manually update when you trigger a refresh in the data panel, or never refresh (until you update the setting).
To change your update settings, click Data > Manage Refresh and select how often you would like your diagram to be updated.
If you connected your roadmap to an Excel spreadsheet or CSV, you will need to replace the dataset as you make adjustments (there is not an automatic update option). To replace the dataset, click Data > Manage Data and follow the prompts to reimport your dataset.
Congratulations! You’ve just created a powerful, data-driven roadmap! Now let’s add more powerful visualizations by creating conditional formatting rules.
See how data linking works in the following product roadmap example.
3. Apply conditional formatting to see development stage and project status
Now that your roadmap is connected to a spreadsheet, you can set rules that will read your data and trigger visual indicators of the product development stage and project status.
Lucidchart currently offers three types of conditional formatting:
- Shape formatting will allow you to set rules to change shape and line color, style, and width.
- Icon Sets will allow you to set rules that attach icons such as colored circles, checkmarks, and warning signs to your shapes.
- Dynamic Shapes will allow you to set rules to show progress, percentages, ratings, scores, and amounts.
For example, you could use conditional formatting to color-code tasks according to their development stage or add icons to indicate their level of completion. This kind of formatting provides at-a-glance confirmation of task progress and team alignment. The tutorial below will show you how to use conditional formatting.
Practice conditional formatting by running through the example of color-coding tasks according to their development stage. Click the template below to get started.
Follow these simple instructions:
- Open the Conditional Formatting panel on the right by clicking on the wand icon.
- Click “Create Rule” and double-click the title at the top to rename the rule Development Stage.
- Under “Formatting,” choose “Shape Style.” This will change the fill color of the tasks in our product roadmap to indicate what stage they are at.
- In the "If…" section, change Text to Shape Data.
- In the "Property" field, either select "Development Stage" from the drop-down or type it in.
- In the third drop-down, select "Contains" and type in "late" below it.
To create more rules that indicate when a task is completed or in progress, open the conditional formatting panel, select the ellipses on the right side of the rule, click duplicate, and update the �“Contains” field and shape formatting color.
4. Use Smart Containers to organize product features by priority
As a project manager who is responsible for maintaining a product roadmap, other departments and teams rely on you for updates on product releases.
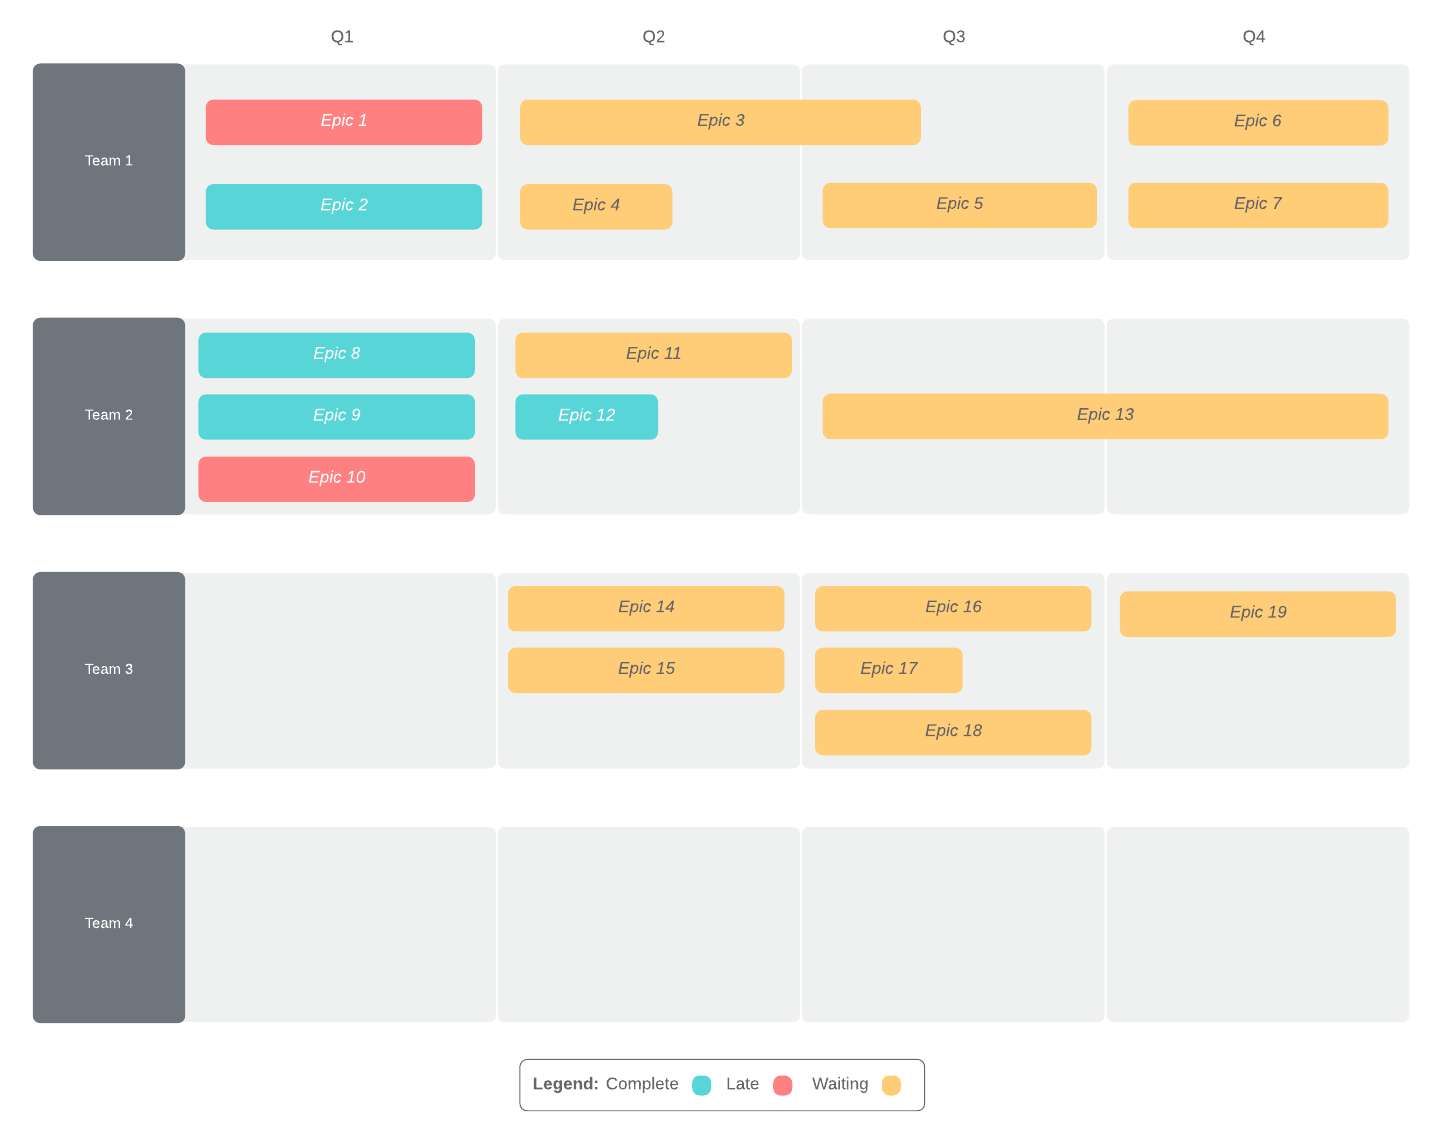
Lucidchart makes it easy to visualize product features according to quarter, team, and priority. Smart Containers do all the heavy lifting by automatically generating groups based on your imported data. They also provide flexibility into quickly changing the layout to gain different insights about your data, i.e. what team is working on a project, what is the priority level, how much time will it take them, etc.
This following tutorial shows you how to use Smart Containers.
Practice using Smart Containers to visualize what quarter certain feature releases will be taking place. Click the example below to get started.
Follow these simple instructions:
- Navigate to File > Import Data, and select “Smart Containers.”
- Click “Import Your Data.”
- Choose the dataset you want to import. You can import data from Google Sheets, Excel, BambooHR, or a CSV file.
- Choose how you want to group your data in Smart Containers. In this example, we want to separate projects by quarter. Select the “quarter” field for “containers” and the “product feature” field for “shape title.”
- The next window of the import dialog will ask you to select a field of your data that contains unique information. It will provide percentages to help you identify how unique your fields are. Select a field, then click "Next."
There you have it! You now have a powerful visualization of what quarter certain features will be released. Now, let’s say you need to look at feature releases grouped by their priority level. No need to recreate the whole roadmap—you can easily modify the grouping by clicking the drop-down menu under “Group By” on the left panel and selecting a different field.
5. Make your roadmap a digital, interactive single source of truth
By making your roadmap a “single source of truth,” product managers and stakeholders are able to find everything they need and ensure that it is up to date, all in one place. Use hotspots and action links to make your diagram interactive and connect tasks to files, documents, and other content that is relevant.
Action links can connect to another page within the document or an external page. Follow these steps to create a link:
- Select the task or epic you want to turn into a link.
- Click on the lightning bolt icon in the properties bar.
- A window will appear with the option to select a link action. Choose “Link to Page” or “External Link.” Follow the prompt and add the URL you want to link to.
- Click “Done.”
Additional tips for creating your product roadmap
You did it! Congratulations on taking your product roadmap to the next level. Check out additional roadmap tips below.
Pro tip #1: Build a legend
When using conditional formatting rules to indicate the development stage, level of completion, and other conditions on your roadmap, include a legend to add an additional level of clarity for project stakeholders.
Pro tip #2: Use an action link to connect your data set to your diagram
Because our product roadmap is linked to an external dataset, it can be helpful to have a link to that data on your diagram, thus creating a “single source of truth” and an easy way to navigate between your roadmap and the data set.
- Click Search > Images.
- Type “Google Sheet Logo,” “Excel,” or “CSV.”
- Drag the logo onto your canvas, and click the “Actions” lightning bolt icon.
- Choose “External link” and paste the URL for your dataset.
Pro tip #3: Set update reminders
Send yourself reminders to update your roadmap before your weekly meetings. To set reminders:
- From the document page, hover your mouse over a document.
- Select "More."
- Select “Set reminder.”
- Check the box and enter the number of days in the blank space.
- Press "Ok."
Want to see how others are using Lucidchart for project management? Check out our Lucidchart for Project Managers interactive document for weekly project status report examples and templates.
About the author

Paige Allen specializes in training for advanced technical audiences, domain expertise, instructional design, and persona content creation as a Sr. Product Education Specialist at Lucid. When she’s not training, you’ll find her at the gym, whitewater rafting with her husband, scuba diving, on motorcycle trips, or anywhere outside.
About Lucidchart
Lucidchart, a cloud-based intelligent diagramming application, is a core component of Lucid Software's Visual Collaboration Suite. This intuitive, cloud-based solution empowers teams to collaborate in real-time to build flowcharts, mockups, UML diagrams, customer journey maps, and more. Lucidchart propels teams forward to build the future faster. Lucid is proud to serve top businesses around the world, including customers such as Google, GE, and NBC Universal, and 99% of the Fortune 500. Lucid partners with industry leaders, including Google, Atlassian, and Microsoft. Since its founding, Lucid has received numerous awards for its products, business, and workplace culture. For more information, visit lucidchart.com.


